利用docker的macvlan为qBittorrent设置一个单独的IP
家里有一台N305的软路由,分别安装了OpenWrt(192.168.31.1),群晖(192.168.31.2),Ubuntu24.04(192.168.31.3),qBittorrent安装到了群晖的docker,OpenWrt安装了Mihomo,在实际使用过程中发现如果开启了代理全部端口qBittorrent的流量会经过代理服务器,在流量不多的情况下很快就会跑完代理服务器的流量,虽然开启只代理常用端口可以解决这一问题但并不是我想要的结果。经过一翻Google发现利用docker的macvlan可以为qBittorrent单独设置一个IP地址,这样就可以利用Mihomo的代理黑名单功能让qBittorrent流量不走代理。
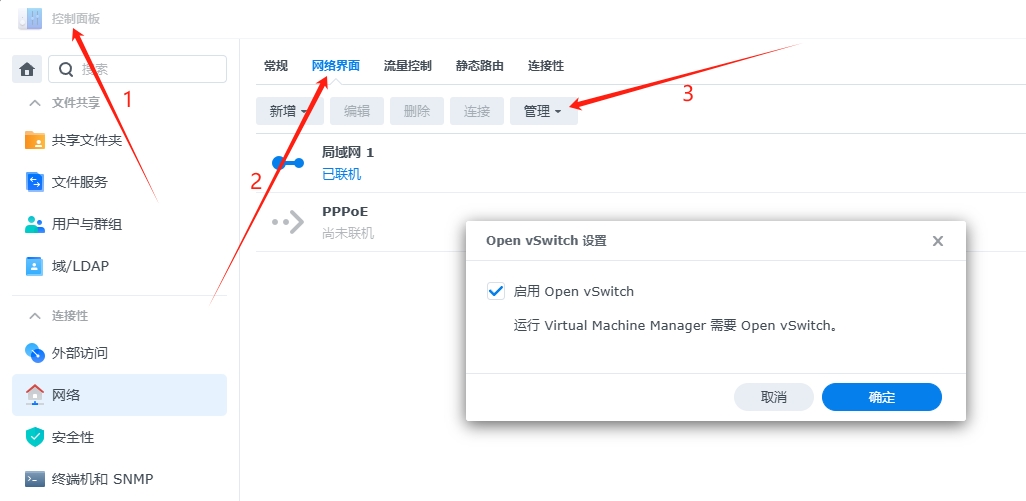
开启群晖的Open vSwitch
点击控制面板—->网络—->网络界面—->管理—->Open vSwitch,开启Open vSwitch功能
查看群晖和docker网络信息
SSH连接群晖后输入
sudo -i # 为了后续操作方便先切换到root用户 |
会看到一个名为ovs_eth0的网络接口
接着输入
docker netwrok ls |
这时会列出docker的所有的已有网络
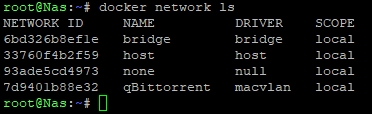
qBittorrent是我已经建好的macvln,如果想删除已建好的macvlan可使用命令:
docker network rm macvlan_name |
创建macvlan
创建macvlan使用如下命令:
docker network create -d macvlan --subnet=192.168.31.0/24 --gateway=192.168.31.1 --ipv6 --subnet=2409::/60 --gateway=2409::1 -o parent=ovs_eth0 qBittorrent |
subnet=192.168.31.0/24 IPv4网段
gateway=192.168.31.1 IPv4网关
ipv6 启用IPv6
subnet=2409::/60 IPv6前缀(此写法仅限中国移动)
gateway=2409::1 IPv6网关
parent=ovs_eth0 docker网络接口的名称
qBittorrent macvlan网络的名称
IPv6前缀和网关的写法除了上述写法外还可以使用:
- subnet=fe80::/60 gateway=fe80::1
- subnet=fd00:9248:6b2c::/48 gateway=fd00:9248:6b2c::1具体的前缀和网关要根据OpenWrt接口—->全局网络选项的设置进行修改
完成后再次输入:
docker network ls |
就会发现多一个名为qBittorrent的macvlan网络接口
创建qBittorrent容器
使用如下命令创建qBittorrent容器
docker run -d --name=qBittorrent --net=qBittorrent --ip=192.168.31.4 -v /volume1/qBittorrent/config:/config -v /volume1/qBittorrent/download:/downloads --privileged=true --restart=always superng6/qbittorrent:latest |
name=qBittorrent 容器的名字
ip=192.168.31.4 容器的IP地址
v /volume1/qBittorrent/config:/config 容器config文件和群晖共享文件夹的映射
-v /volume1/qBittorrent/download:/downloads 容器downloads文件和群晖共享文件夹的映射
至此就创建了一个IP地址为:192.168.31.4的qBittorrent容器,将此IP地址加入到Mihomo的代理黑名单中流量就不会经过代理。